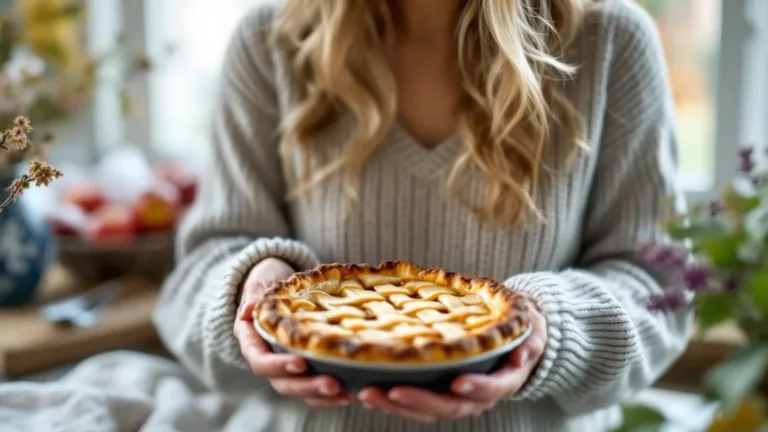
As we roll into late March, with the UK’s unpredictable Spring weather swinging between sunny spells and sudden showers, there’s one thing that never fails to brighten up the day: a homemade apple pie. The delightful aroma wafting through your kitchen can instantly transport you to a cosy café rather than a supermarket aisle. But let’s be honest—nothing’s worse than cutting into your freshly baked pie only to discover that it tastes as flat as yesterday’s leftovers. So, let’s dive into the pastry mistakes that can sabotage your scrumptious masterpiece.
At a Glance
- Common Mistakes to Avoid 🚫
- Keeping It Cool – The Importance of Chilled Dough ❄️
- Choosing the Right Apples 🍏
- Thickeners Matter – Keep It from Being Runny 💧
- Letting It Rest – Patience is Key ⏳
Did you know? By 2026, baking enthusiasts have shifted focus to healthier variations of classic recipes like apple pie, experimenting with gluten-free and low-sugar alternatives!
Common Pastry Mistakes That Ruin Your Apple Pie
First up, let’s tackle the most pesky pitfalls of pie-making. Ever pulled your pie out of the oven only to find that the crust is more soggy than the weather outside? Soggy crust is often a result of leaving your dough out for too long before adding the filling. Butter in pastry needs to stay cool to create that delicious, flaky texture. If it melts before hitting the oven, you’re in trouble. So, keep your pastry chilled until just before baking.
Another classic error is baking at the wrong oven temperature. The middle rack may seem like the safe choice, but it won’t give your crust the crispiness that makes it sing. Placing your pie on the bottom rack allows it to get that much-needed heat from below, ensuring a beautiful crust without the dreaded dampness.
Lastly, a quick brush of egg wash on the crust can create a protective barrier against excess moisture. It’s not just a pretty finish; it plays a crucial role in achieving that perfect bite!
Choosing the Right Apples for Maximum Flavor
Now, let’s consider the stars of the show—your apples. Picking the wrong variety can lead to a pie that tastes more like mush than a tart delight. Opt for firmer types like Granny Smith or Honeycrisp, which hold their shape beautifully during baking. Softer apples like Gala or Red Delicious tend to break down, leaving you with a runny filling that barely resembles the hearty filling you envisioned.
It’s vital to avoid very ripe apples, as they’ll add to the sogginess of the filling and leave you with a sad, drippy pie. Also, you’ll want to be careful with your chopping; aim for 1/4-inch slices, which provide the right balance between texture and tenderness.
When you get your apple choice right, the flavour elevates your pie from ordinary to extraordinary. A mix of sweet and tart varieties can create layers upon layers of nuance, ensuring each bite is an adventure.
The Importance of Thickening Agents
If your pie filling ends up too runny, it’s often due to neglecting thickeners. As your apples cook, they release moisture that can leave your pie looking more soup than filling. To counteract this, incorporating thickeners like cornstarch or flour is crucial. They absorb excess moisture and keep your pie slices intact when served.
Remember, not all thickeners are created equal. Each has its own peculiarities—cornstarch creates a glossy finish, while flour offers a more rustic texture. Choose the one that aligns with your ideal pie vision, and don’t forget to mix it with sugar before adding it to the apples to ensure even distribution.
Skipping this step is akin to inviting disaster; the filling turns runny, and your glorious pie is reduced to a puddle. Layer upon layer of thick, spiced apple goodness should be what you aim for—no one wants a soggy slice!
Letting Your Pie Rest
Patience, my friends. It may be hard to resist cutting into a freshly baked pie, but waiting at least an hour allows the filling to set. The residual heat needs time to thicken up, giving you that ideal slice when serving. Cutting too early leads to a splodge of filling oozing out rather than a dignified, picture-perfect slice.
By allowing it to cool, you’re not just setting the filling; you’re enhancing the overall flavour. When warm, flavours can often seem muted, and letting your pie rest allows them to reach their full potential.
As tempting as it is, remember that a bit of patience goes a long way in creating an impressive dessert that tastes far superior to anything you might find on a supermarket shelf.
What’s Next?
Feeling inspired to bake? Gather your apples, chill that pastry, and get ready to impress your guests (or simply treat yourself). With these tips in hand, you’ll be well on your way to creating a homemade apple pie that tastes out of this world—no supermarket taste anywhere in sight!
Note: This article is for general information only and does not replace professional advice.